A Perfect Fit
Do you ever have one of those spots in your house where you are just waiting for the perfect thing to come along and fit the space? You know the spot and you probably have the measurements for it saved in the notes app on your phone. As soon as we moved into our house there was a big gray utility breaker box on the wall that you see right when you walk in the front door. I knew I wanted to hide it with a tapestry or something. The only thing wrong is the wall it is on is concrete and I knew whatever I hung had to be able to be moved easily so that the breaker box could be accessed if needed. Of course it took forever for our stuff to arrive and covering the ugly gray box became low on my priority list once our stuff was finally delivered. As we were unpacking and digging our way through all of our items I found my chalk board that used to hang in our kitchen in our last house! I held it up and sure enough it would cover the box perfectly! The only problem was that I painted the wood frame bright teal and added gray flowers to it years ago when I first bought it.
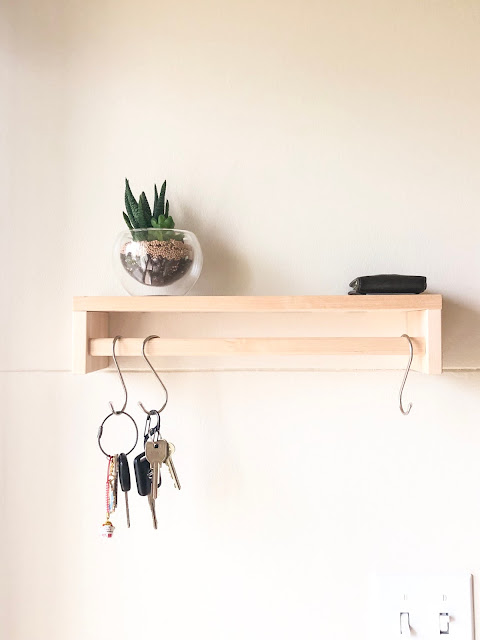
Originally I had planned to just sand the whole frame back down to its natural wood and leave it that color. It would have matched the key holder I made perfectly and they wouldn’t be located too far from each other. I went to Makeman which is our local hardware store here in Japan and bought a couple different grits of sandpaper and went to town sanding. Umm who knew sanding was such work?! The frame has a tiny groove all the way around it and trying to sand the paint out of there was proving to require way more elbow grease than I was willing to provide. So I went for the next best option...paint!
I bought a dark gray to cover the teal because I wasn’t too sure how well the milk paint would cover it and I didn’t want the teal to show through the white. The milk paint ended up having pretty decent coverage and was easy to work with. I really liked it because it had a matte finish when it dried. It reminded me a lot of chalk paint.
Once I got the hardware moved it was time to take it over to the breaker box. I was nervous because I knew I would be using command hooks to hang this since the wall was concrete and I was hoping that the hardware for hanging it would line up with the wall and not be half on the breaker box. I figured if that happened I would try to get some strong magnets and just glue them to the back of the board since the breaker box is metal. Lucky for me the command strips were able to go just on the sides of the breaker box so perfectly like it was made for that spot! Gosh, I just love it when things like that happen.
The final thing I did was bend the command hooks. The kind I was using were going to hold the chalk board too far out from the wall and I wanted it to hug the wall as close as possible since we walk through here all of the time.
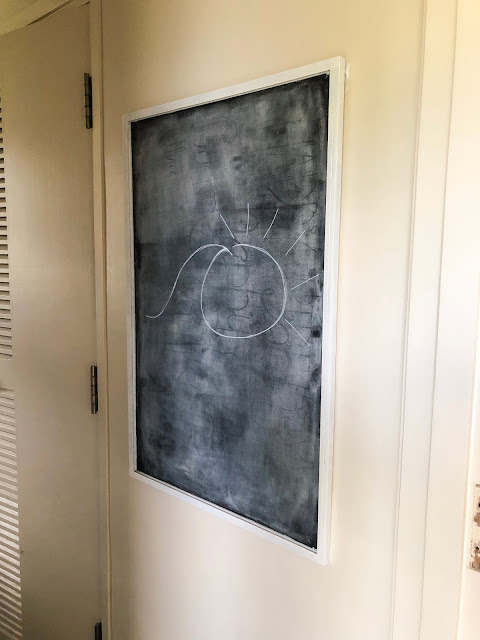
And thats it!! I hung it on the wall and threw up this cute little wave/sun art. I need to get "real chalk" to prime my chalkboard but I love using these chalk markers for actually writing or drawing on my board. They are easy to use and have neater lines than traditional chalk.
Since my chalkboard is over 7 years old I couldn’t find an exact one, but this one is even better than mine because it is magnetic and doesn’t appear to have that annoying groove in the frame. Its natural wood color would be easy to paint any way you like to match your current decor.
I also found some milk paint that comes in a variety of colors and wont break the bank. If you haven’t tried this type of paint yet I recommend it. It was very easy to work with.
Thats all for now! I have a fun living room post coming soon that you wont want to miss. It has to do with our tv cabinet (if you follow along on Instagram then you probably saw it in my stories) I really dont know how I get myself into some of these situations!
Thanks for being here 💕
-Ashley
Pin for later:
↴

 |
| I didn’t grab a before picture so that was after I had already started sanding it. |
Originally I had planned to just sand the whole frame back down to its natural wood and leave it that color. It would have matched the key holder I made perfectly and they wouldn’t be located too far from each other. I went to Makeman which is our local hardware store here in Japan and bought a couple different grits of sandpaper and went to town sanding. Umm who knew sanding was such work?! The frame has a tiny groove all the way around it and trying to sand the paint out of there was proving to require way more elbow grease than I was willing to provide. So I went for the next best option...paint!
 |
| See that annoying groove?! (and my dirty floors) |
We happened to be at another home improvement store over the weekend called Cainz and so I ventured over to their DIY section where the paint was located. Finding things here is always a fun experience because the containers usually dont have any english on them and if they do its usually only a few words. I ended up finding some milk paint which I have heard people talk about but I personally have never used. I decided this was as good a time as any to try it and I grabbed two colors.
 |
| I couldn’t read any of the directions so I just had to wing it. |
 |
| Sorry for the poor lighting... the only time I can work on projects is at night once my babies are in bed :) |
Once I got the hardware moved it was time to take it over to the breaker box. I was nervous because I knew I would be using command hooks to hang this since the wall was concrete and I was hoping that the hardware for hanging it would line up with the wall and not be half on the breaker box. I figured if that happened I would try to get some strong magnets and just glue them to the back of the board since the breaker box is metal. Lucky for me the command strips were able to go just on the sides of the breaker box so perfectly like it was made for that spot! Gosh, I just love it when things like that happen.
 |
| You can see here that the chalk board is just wide enough to cover the breaker box. |
 |
| I used a pair of pliers to gently bend the command hooks so that the chalk board would hang as snug to the wall as possible |
And thats it!! I hung it on the wall and threw up this cute little wave/sun art. I need to get "real chalk" to prime my chalkboard but I love using these chalk markers for actually writing or drawing on my board. They are easy to use and have neater lines than traditional chalk.
Since my chalkboard is over 7 years old I couldn’t find an exact one, but this one is even better than mine because it is magnetic and doesn’t appear to have that annoying groove in the frame. Its natural wood color would be easy to paint any way you like to match your current decor.
I also found some milk paint that comes in a variety of colors and wont break the bank. If you haven’t tried this type of paint yet I recommend it. It was very easy to work with.
Thats all for now! I have a fun living room post coming soon that you wont want to miss. It has to do with our tv cabinet (if you follow along on Instagram then you probably saw it in my stories) I really dont know how I get myself into some of these situations!
Thanks for being here 💕
-Ashley
Pin for later:
↴


Comments
Post a Comment